ROS Basics: PubSub vs. SerCli
요약
내용 정리
I. Introduction
II. Difference between publisher-subscriber vs. server-client
해당 함수를 ROS에 구현하기 위해서 두 가지 방법, publisher-subscriber(이하 pubsub)와 server-client(이하 sercli), 중 후자를 사용하였다. 두 방법 모두 기본적인 ROS 튜토리얼에 있었으며, 두 방법의 차이는, pubsub의 경우 보다 주기적인 경우, 그리고 여러 가지에 대해 publish 및 subscribe가 가능하다…고 한다. 그에 반해 sercli의 경우 보다 request-response에 가깝다.
위 내용만 보면 pubsub의 경우 로봇의 실시간 제어를 위한 데이터(e.g., SLAM 관련 알고리즘)에 보다 적합해 보이고, sercli의 경우 자주 계산할 필요는 없는 경우에 대해서 사용하면 좋을 것으로 보인다.
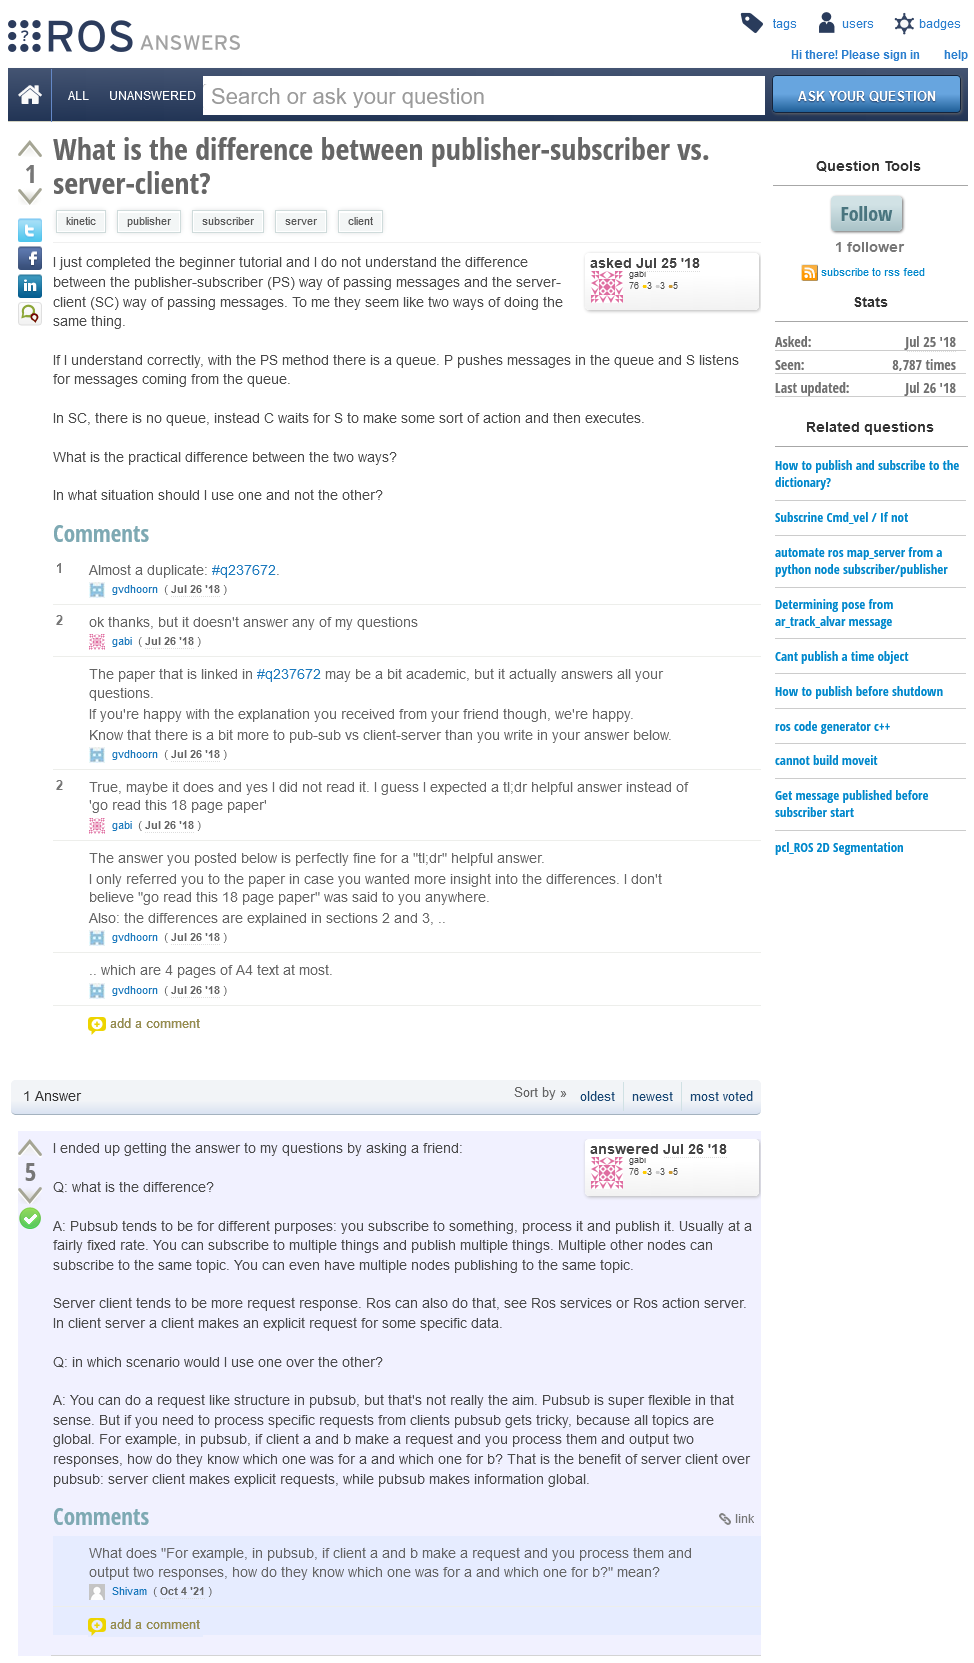
백업용 웹페이지 스크린샷
III. Server-client example code
예제 코드부터 다뤄본다, 이 예제는 ROS 공식 홈페이지에서 주어지는 코드이다.
ROS 튜토리얼: Writing a Simple Service and Client (Python)
III-I. Server example code
먼저 server 코드부터 확인한다. 경로와 파일명은 scripts/add_two_ints_server.py 이다.
#!/usr/bin/env python

from __future__ import print_function

from beginner_tutorials.srv import AddTwoInts,AddTwoIntsResponse
import rospy

def handle_add_two_ints(req):
    print("Returning [%s + %s = %s]"%(req.a, req.b, (req.a + req.b)))
    return AddTwoIntsResponse(req.a + req.b)

def add_two_ints_server():
    rospy.init_node('add_two_ints_server')
    s = rospy.Service('add_two_ints', AddTwoInts, handle_add_two_ints)
    print("Ready to add two ints.")
    rospy.spin()

if __name__ == "__main__":
    add_two_ints_server()
Line by line으로 알아보려고 한다.
#!/usr/bin/env python

from __future__ import print_function
ROS1은 공식적으로는 Python 2.7을 사용하며, 때문에 print를 사용하기 위해선 future(i.e., Python3)에서 print를 가져와야 한다. 필자는 Python3에 익숙해져 있어서, 아래 링크를 따라하고자 한다.
ROS1 Python3 확인 링크 1
ROS1 Python3 확인 링크 2
from beginner_tutorials.srv import AddTwoInts,AddTwoIntsResponse
튜토리얼 srv 파일에서 AddTwoInts,AddTwoIntsResponse class를 가져온다.
Service
Service는 ROS Topic의 message와 동일하며, srv 파일로 정의된다. 그리고 rospy가 srv 파일에서 3 개의 classes를 만든다: service definition, request message, 그리고 response message. 각각의 class 이름은 지정한 srv 파일명에서 자동으로 생성된다.
e.g.,
my_package/srv/Foo.srv → my_package.srv.Foo
my_package/srv/Foo.srv → my_package.srv.FooRequest
my_package/srv/Foo.srv → my_package.srv.FooResponse
Service definition은 위 예시 코드처럼 import하고, 그리고 service initialization method에 전달해야 한다.
add_two_ints = rospy.ServiceProxy('service_name', my_package.srv.Foo)
위 예시는 client code에서 동일하게 함수 안에 있다.
add_two_ints = rospy.ServiceProxy('add_two_ints', AddTwoInts)
Service request messages는 service를 호출(call)하기 위해 사용되는데, 일반적으론 이를 직접 사용할 일은 많지 않다고 한다.
Service response messages는 service에서 return된 값을 보관하기 위해 사용된다.
Service proxies
Service는 rospy.ServiceProxy를 통해 호출될 수 있고, service가 available할 때까지 대기시키기 위해서는 rospy.wait_for_service를 사용하면 된다.
rospy.wait_for_service('add_two_ints')
add_two_ints = rospy.ServiceProxy('add_two_ints', AddTwoInts)
try:
  resp1 = add_two_ints(x, y)
except rospy.ServiceException as exc:
  print("Service did not process request: " + str(exc))
예시 코드에서 먼저 rospy.wait_for_service 이후 rospy.ServiceProxy를 실행하는 것을 확인할 수 있다. 그리고 try-except 에서 확인할 수 있듯이, 에러 발생 시 rospy.ServiceException이 나온다. 마지막 줄처럼 작성 시 error message를 확인할 수 있다.
rospy.ServiceProxy와 rospy.wait_for_service의 parameter는 다음과 같다:
rospy.ServiceProxy(name, service_class, persistent=False, headers=None)
rospy.wait_for_service(service, timeout=None)
- Service call을 하기 위해 ROS node를 만들 필요는 없다.
rospy.ServiceProxy는 아래 예시처럼, 함수처럼 callable하다.
add_two_ints = rospy.ServiceProxy('add_two_ints', AddTwoInts)
add_two_ints(1, 2)
Arguments를 전달하는 방법은 세 가지가 있는데, explicit한 방법 하나, 두 가지 implicit한 방법이 있다. Explicit은 내가 직접 service request message instance를 만들어서 주는 것이고, implicit은 함수가 message를 만들어 주는 것이다.
Explicit style은 아래와 같이 Request class를 통해 publish한다.
req = rospy_tutorials.srv.AddTwoIntsRequest(1, 2)
resp = add_two_ints(req)
Implicit style with in-order arguments는 in-order라는 말처럼, 순서에 맞게 arguments를 입력해야 하며, 모든 arguments를 입력해야 한다.
resp = add_two_ints(1, 2)
Implicit style with keyword arguments는 python에서 특정 argument를 전달하는 방식처럼, argument 이름을 지정하여 전달한다. 위 방법과는 달리, 모든 argument를 전달하지 않아도 되며, 그럴 경우 지정된 default value가 전달된다.
resp = add_two_ints(a=1)
- 그래도 몇몇 datatype은 자동으로 message가 만들어지지 않아서, instance를 만들고 전달해야 한다. 예를 들어, 위와 같은 형태인데 datatype이 std_msgs/String일 경우 아래처럼 전달해야 한다.
from std_msgs.msg import String

add_two_ints = rospy.ServiceProxy('add_two_ints', AddTwoInts)
add_two_ints(String(1), String(2))
Persistent connection은 위 예시처럼 rospy.wait_for_service로 연결하는 것 말고도, rospy.ServiceProxy의 입력 인수를 persistent=True로 하여, 지속적으로 연결해, client가 different node에 연결할 때마다 service call을 하도록 할 수 있다.
Providing services
앞서 service를 호출하는 방법을 확인했다면, 이번에는 service를 제공하는 방법을 확인한다. 이는 rospy.Service instance를 만들어 수행하고, 해당 class instance의 initialize는 아래와 같다.
rospy.Service(name, service_class, handler, buff_size=65536)
name은 말 그대로 이름을, service_class는 srv 파일을 통해 만들어진 class이다. 그리고 handler를 통해 service response를 출력한다. 아래의 단순히 int add 예시에서 확인할 수 있다.
def add_two_ints(req):
    return rospy_tutorials.srv.AddTwoIntsResponse(req.a + req.b)

def add_two_ints_server():
    rospy.init_node('add_two_ints_server')
    s = rospy.Service('add_two_ints', rospy_tutorials.srv.AddTwoInts, add_two_ints)
    rospy.spin()
참고문헌
[1] https://answers.ros.org/question/298612/what-is-the-difference-between-publisher-subscriber-vs-server-client/
Leave a comment